
I made up the box and it sat there in the garage for several weeks. Somehow I just couldn't get round to finishing the project. It was the thought of deciding how much material it would take and of mixing up the material. I enlisted D to help with the calculation and the mixing.

2 parts peat moss, 2 parts vermiculite to 1 part portland cement and water added to make a cottage cheese like consistency.

I strengthened the box using tape and bungee cords looped together and added some chicken wire for reinforcement and 5 corks in the bottom for drainage. Then I added the hypertufa, building up the sides to form the right thickness and height. After 2 days I removed the form and wire brushed the surface.

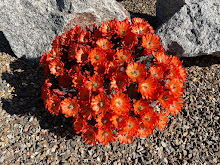
Planting time. I bought a couple of new sedums, Sedum rubens 'lizard', and from my own garden, bunny ears cactus, Opuntia microdasys, Confederate rose agave, Agave potatorum, and Sedum potosinum.


17 comments:
Looks great! I've got the ingredients and am just waiting for the snow to disappear to try making one.
Very nice! I've never made something that long -- does the chicken wire make that much difference? The foam insulation is a great idea which I'm going to steal. :)
Great looking planting trough! I especially like that you nailed perfectly the aged appearance. What's next, one of those fabulous staddle stones? ;-) I've been drooling over those for years.
Well done. I have a couple of styrofoam boxes in the garden shed waiting for me to get the gumption to try something like this.
Well done, the result is very nice!
Wow...it really turned out great!
No need to wait for the snow to go. Make it in the garage. It will need to weather some before you plant it and spring rains will be perfect for that.
To be honest Alan the chicken wire lines the bottom and part way up the sides. I didn't know where to get the reinforcing fibers they talk about. I think it will help particularly as it is so long but it is super lightweight.
I was really happy with the brushing and it only took a few minutes. Staddle stone? Now there's an idea!
I have a styrofoam box too but I was thinking I needed to cover that with chicken wire and that would be a lot of work. This came apart so easily and I will be able to reuse it. The cement doesn't even stick to it.
Thanks sweetbay. i am very happy with how it turned out.
Thanks Scott. I plan a few more using the same form but a smaller size.
Nice craftsmanship. What did your soil consist of?
Wow, this is just the right amount of rustic charm my garden needs. So many projects, so little time...
AKKKKK! I LOVE them so much!!! It is really, really lovely. I've always wanted to do this. Now I'm inspired.
I love it too! thanks a lot for the inspiration!
I love this huge one. I will make it this year for sure! Thanks for that foam mold idea.
Post a Comment