My Blog List

Showing posts with label trough gardens. Show all posts

Wednesday, May 13, 2020

IT HAS TO BE DONE

There's a lot more to having a garden than planting, pruning and primping. There are those tasks that I call grunt jobs. Maintaining the structures you have added to give interest, like benches, woodwork, metal art, pots, patio floors, bird baths. I have quite a few of these and on several afternoons this past week it seemed the perfect opportunity to get out of the sun and sit in the shade.


These are the two signs that go above the side entrance and the Sun and Moon Archway. Wind, rain and the Texas sun take their toll on any kind of protection you might add. I found myself a shady spot on the patio, where I could continue to enjoy the garden, and in no time the job was done, the signs re-installed.


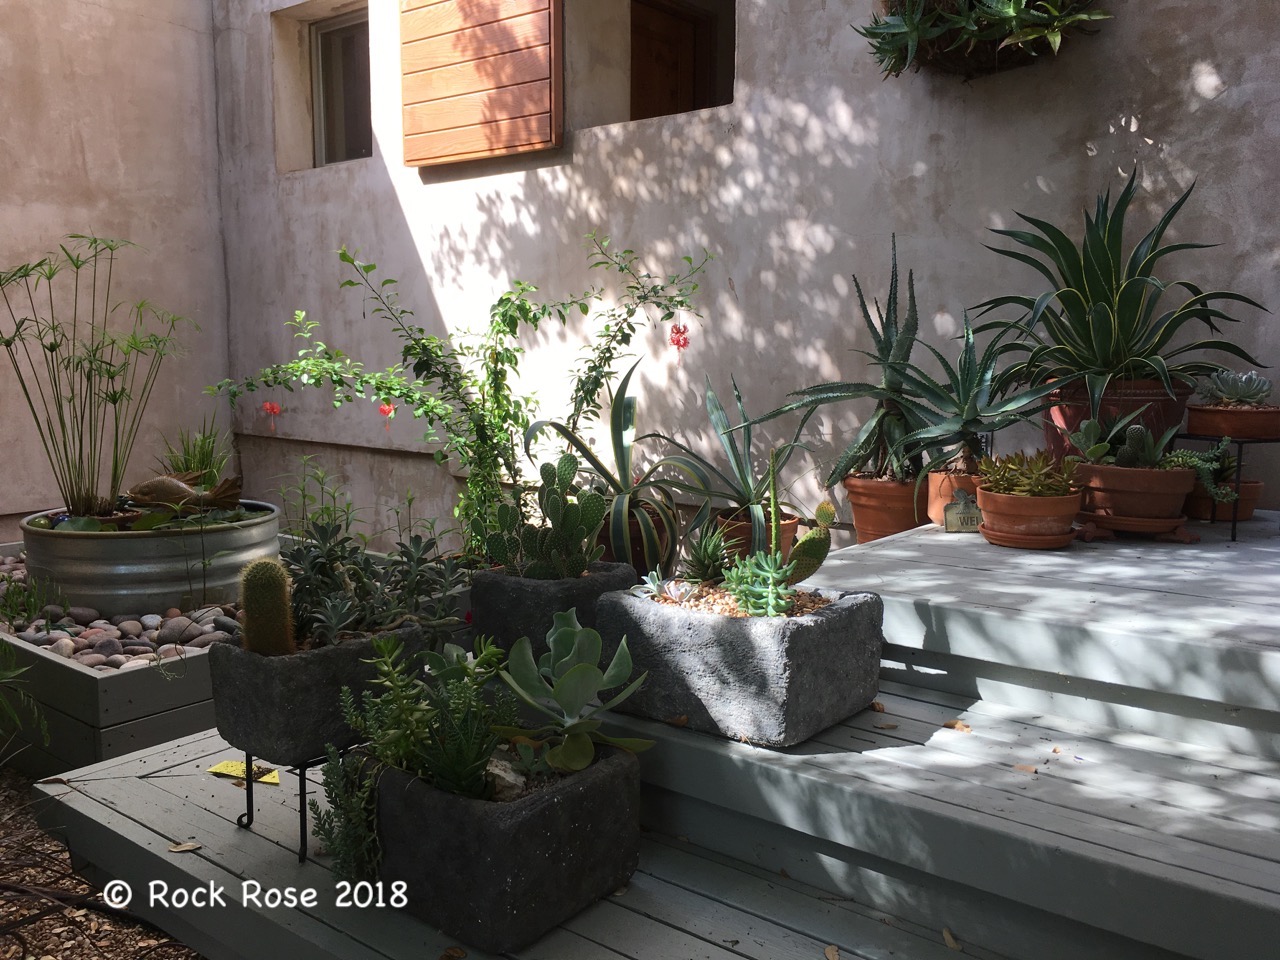
While I had the can of sealant out I decided it was time for a refresh of all my home-made hypo-styrene pots.


Many of the plants had grown leggy with time and imperfect growing conditions. They needed to be cut off and replanted but before that a spell on the  patio table was the perfect place to callous over the cut ends.


I am always trying to make doo with what I have with just the occasional new purchase. This is one of my favorites which also looks as though it could do with a trim.


With a new coat of sealant they are all ready for the summer heat.


Next job was the Ziggurat steps at the side entry. I remember learning about Ziggurats in elementary school. What a perfect name. I don't know if this is a general name for these kind of steps or was just someone else's interpretation but when I came across the name in an article on Folly Farm I decided to rename my steps. Edwin Lutyens did many renditions of these kind of steps, some of which are curved. They have all stood the test of time. You can read all about the stunning remake of Folly Farm by Dan Pearson. Of course Lutyens' were made of stone so the necessary work of removing leaves from inside the joints was never needed. Unfortunately for us, wooden steps require a little more maintenance especially when situated beneath a live oak tree. The only way to do the job is to poke all the debris out using a piece of wire coat hanger.


Then the steps need to be washed down and re-stained. Thankfully I could pass that job on to David.


The Carolina wrens, who make their annual nest on my cactus theatre have fledged. We had no idea the theatre was going to provide such entertainment. We sat outside in the garage link and watched them build, worried about the safety of the nest from snakes and then the busy feeding time. Then one day the mother was singing away in the tree calling them from the nest and within two days they were gone.


Time for a tidy up, a watering and more entertainment as two of the cactus are about to flower.


There are still more jobs like this to be done but right now it is time to clean up all the bluebonnet debris and the live oak leaves that have been hidden beneath them. It is a big job and will take several days.

Friday, October 19, 2018

INITIUM EST DIMIDIUM FACTE

Years ago we had a family website which we gave the above name. It sounded so much better than Half the Work is Getting Started. All that was on our mind at the time was the tremendous job that faced us in designing and building the garden. It was quite daunting, but we chipped away at it until it is what it is today. Those latin words have been rolling around in my head recently. And they are good words for me to remember because I have a tendency to let projects sit for a while and then finally when I get around to doing them I realize they didn't take too long at all and their competition gave me untold satisfaction. Case in point, the ever growing pile of styrofoam containers waiting to be turned into garden troughs.


This is what I call a feel good project. Most people put no value on them once they have served their initial purpose and frequently toss them out in the garbage. Or they may put a little value on them and sell them for dollar at a garage sale. It makes me feel good that I am repurposing and saving them from the landfill as well as providing a home for one of my succulents.
It's just getting started on the project is half the battle. The first step is to brush the outside surface with a wire brush and it is one messy job. This time I took myself outside and sat on the edge of the driveway in the shade, mask on and large sheet of plastic on the ground to collect all the bits. It's impossible not to get it all over everything. A few holes drilled in the bottom assured good drainage.


I try to make them more realistic by cutting the tops unevenly and brushing more off in some places. That done the surface needs to be sealed. In the past I used a barbecue lighter and a candle but this time I treated myself to a small heat tool. It costs around $12 dollars after using a 50% coupon at the local craft store.
Next job was to paint. I made a better job of painting this time by giving each box a complete undercoat of gray. The same paint I used to paint the potting shed cupboards-an alkyl latex paint, which I happened to have on hand. Doing this makes sure that the whole surface is protected as well as easier to faux finish.


These are the paints I chose for the finished look.


And the brush I use. It's a good idea to use and old brush with rather open bristles so you get the right paint effect.


I squeezed a little of the paint into a tray and dabbed the brush lightly picking up a little of each color and using a stippling technique applied to the painted surface until I achieved a stone-like effect.


When dry I applied a light coat of satin finish sealant. I have never done this before but decided this would probably extend their life.


Now the fun bit. Planting up with succulents and of course a few pieces of rock. it would be easy to go out and buy new plants but I have so many pots of small succulents to chose from and of course plenty of rocks.


Of course most troughs are made for alpine plants but that is just not going to work here with our hot, humid summers.


I still have the larger ones to plant up but they will soon be together in the new area of the garden called the Troughery.

Saturday, June 16, 2018

THERE'S A DRAGON IN THE GARDEN

There's a dragon in the garden and he's breathing his fiery breath over my plants.


The dragon was a chance find at an estate sale and as things are at the moment I thought he deserved a place over here.

Can it just be a 6 weeks ago that I was lamenting that 3" downpour on the day of the Fling visit to my garden. Since then we have been completely dry. While other gardeners were recently blessed with another 3" downpour, the storm passed to the north and left nothing here. My stock tanks are empty. This summer is wearing thin-wait a minute it isn't even summer yet. High nineties have been the order of the day for weeks now with a few 100s thrown in. The second flush of flowers, Monarda, Echinacea, Rudbeckia, day lilies have all had a pitifully short season this year. I'm sure I am partly to blame because the soil is poor and drip irrigation has minimal impact when it is so dry.

Who needs flowers anyway? Rocks look pretty good.


and there are plenty of the tough green plants.


The Liatris doesn't seem to need any additional water. In some places it is growing out of the rocks. It is growing everywhere in the front courtyard, having seeded freely, and will bloom with incredible purple spires in the fall........or will that be sooner this year.


Everything has gone quiet in the front courtyard. But that's OK. Less work for me.


Thank goodness for some very tough plants out in the front. These are the plants that manage without additional water although they may not look their absolute best.


And I have moved a few plants into the only shade I have in the side entry courtyard. Even cactus and succulents need a break and I shall be ready for one myself soon.


I have added a battery powered drip irrigation system in here for the summer to water a few plants that need a daily water when I can't be there to do it.


Including the asparagus fern by the garage door. Even the fish have moved into the shade.


There is rain in the forecast for this next week but then we know how that goes.

Monday, February 6, 2017

GOOD GRIEF!

Just when we were enjoying some seasonable days with drizzle-love gardening in this kind of weather- they tell us it is going to be 89º tomorrow and 85º the next day! As a gardener I don't think I can take much more of this. I have spent the last few days beginning the clean up from the rain, terrible cold and even the long lasting results of the terrible hail event we had two years ago and I dread to think what this weather will bring. There is sure to be another freeze.
I might expect a little of this; paper whites in bloom, but even these are a little early for my garden.


Even a little false garlic, Nothoscordum bivalve.


and the odd grape hyacinth, Muscari starting to peak above their stringy foliage. When will I find some grape hyacinth that have more upstanding foliage?


and before the week is out the gopher plant, Euphorbia rigida, will be blooming.


and roses about to bloom. I had to put a stop to that because they need cutting back and I am not waiting any longer. Forget February 14th. It has taken me two days to cut back the roses in the birdbath circle. And I cut them back hard. Last year I didn't do a hard cut so I shouldn't have been surprised, but was, to see that many of lower branches were showing that hail damage. Now it is out and it only remains to see whether the rose will come back. If not then I will replace them with some new ones. I think they have been in there 10 years.

Bark damage caused by hail
Yes, it's a wintery scene in the English garden which doesn't get as much sun as the other gardens.


Having spent the day with the pruners I turned my attention to finishing another little job I had started at the weekend. Painting the small styrofoam cooler I was converting into yet another trough. So much easier and quicker than making the hypertufa trough and one I am starting to favor. This one was discarded by some party goer on. Dumped in a waste bin I quickly saw its potential and snapped it up. People are so wasteful. At the weekend I did the roughing up and sealing job and all that remained was to paint it, which I did this afternoon. Ever eager to get it planted I found some plants that were in need of a new home. It joins the other one I made which has a bunny ears cactus.


I have one more styrofoam trough garden to go and it's a big one. Maybe I'll get started when the temperature soars to near 90º tomorrow.


Friday, December 18, 2015

PUTTING DAYDREAMS INTO ACTION

A quick week away from home had me lying under the casuarina's on a beautiful Caribbean beach. To set the mood for gardening thoughts I had been listening to a Gardeners' Question Time podcast on winter projects. I began to make plans for mine.


A couple of years ago I picked up two styrofoam boxes at a garage sale. Perfect for my plans to cover them with a mixture of hypertufa to make a lightweight trough. It never happened. Then I saw a posting on the Hypertufa Gardener blog about creating a faux hypertufa box. Basically rough up the surface of such a box, seal, and paint the surface to resemble stone. What a great idea. Thanks Kim.
I asked the person in charge of the garage storeroom where my boxes were. "I threw them away" came back the reply. You can probably imagine my reaction without my even telling you. But then a short time later, returning from some errands, David told me to come outside. He thought I would be very pleased. And so I was as he produced not one but three large styrofoam boxes  from the back of the truck.
 

On our return from our trip I thought it prudent to get busy before these too disappeared. What are the tools necessary for this project.
A stiff wire brush.
A sharp knife
Heat gun or simple gas barbecue lighter.
Mask.
Sheet of plastic to put under the work area.
Vacuum cleaner- it will be messy
Acrylic paints.
First thing was to cut off the lip of the box where the lid sat. You can see this on the lower box. Then I roughed up all the sides and the top edge to make a rounded lip. It only took about 15 minutes to do all the sides but it was snowing everywhere. Make sure your work area is out of a draught otherwise the fine beads will blow all over the place.
When you are happy with the surface pass a flame quickly over the box to seal the surface. I didn't have the heat gun which the Hypertufa Gardener had but my barbecue lighter seemed to work just as well as long as you are quick.

Box ready for painting
Then it's time for paint selection. I chose 2 colors of grey, beige and brown.


Pretty easy so far. Now for the hard part and I really mean the hard part. Being economically minded I didn't buy a large can of base coat. Instead I decided to stipple the surface using a thick paint brush and several different colors. It was taking forever and impossible to get in all the nooks and crannies. I gave up on the brush and started using a natural sponge which was what I used in my faux painting days. That was much better. The finish is starting to look more realistic and I may be able to live with this my first faux hypertufa trough.
Next I drilled a few holes in the bottom. Another mess. Next time I will do this at the same time I do the surface roughing. I have also been thinking about how I could make this into a self watering trough. But that is for the future.


I am going to experiment with growing potatoes in this one but will have to wait until next year. For the time being I took it outside, positioned it under the wall, in the spot where citrus spend the summer, and filled it with all the old potting soils that were lying around. I needed the soil out of the clay pots for the winter so there is no risk of spalling. And, I just happened to have a couple of hanging baskets of petunias left over from when Gardeners' Supply came in November.


Thanks Kim for this excellent project.